Showing posts with label A Day in the Life. Show all posts

04 October 2014

Art & Career

Okay, so it's clearly been quite some time since I've actually been on here [insert monkey covering mouth emoji]. oops. Let's just all agree that sometimes we get caught up in other things like baseball and wine working at home grading art projects.

I've also been slacking on Tulips&Lace Studio so my hope is to get some more pieces created and posted on the shop. I've been creating a few things, but I truly don't have a good excuse as to why I haven't been painting as often. Please keep encouraging me on that goal no matter how many sales I have or follows or whatever. I can't let my identity be placed in those things!

Made this poster because I am SERIOUSLY done
with seeing stick figures!
As for school, we are almost through the first quarter with only one week to go until the report cards go out! In no way what-so-ever did I think that I'd actually like going to work at this point. Let's just say that last year was a horrible year at school. Add together moving from elementary to middle school, disrespectful students whose parents don't care at all and not a Fairfax County Virginia art budget and you get a pretty miserable transition into middle school teaching. I honestly cried after school for at least two months and swore I would quit at the end of the school year - but that's a story for another time.

What I have to say is that I LOVE MY JOB. No, I don't get hugs everyday from Kindergarteners anymore, but I do have a huge impact on middle schoolers lives - even if they never tell me. I get to be really sarcastic and sassy (yes, sassy) to the students and they still like me. At parent-teacher conferences, one of my student's mother told me that she hears about me every day at the dinner table and that her daughter loves my class. Of course I will never hear that from the student, but man did that feel good to know I'm actually making a difference and leaving an impression on a student.

I wanted to share what my students have been up to! This year I started using Artsonia to display students work (also so parents actually see it… Last year I believe over half of my students just threw away their work. Thanks you lovely children.) Check out our gallery! All of our projects throughout the year will be posted online to the gallery so keep checking for updates. I've been making my TA's work their butts off to make Artsonia a success in my classroom.

Our Artsonia Gallery

Enjoy the students' work, their artist statements and feel free to leave comments! The kids would be so excited if they got extra comments on their work!

I feel like there's a billion other things I could tell you on here, but the most important thing right now is that the fabulous Orioles have had some BANGIN' 8th innings!

Also this handsome man comes home in a little more than month!

 Until later! xoxo

05 December 2011

A Day in the Life: Student Work

Just on here to share some wonderful photos of my student's work. It's been kind of crazy this past week and weekend with the whirlwind of finding out service selection and then finding out that the woman who worked at the Country Club we're having the reception at no longer works there. And we haven't been contacted by the new person who works there. Trying to figure that out and get everything else done.


Anyway, enjoy some of my student's work!


Let me know if you want to hear the lessons behind these products! Happy Monday & enjoy your week!

31 October 2011

A Day in the Life: Classroom Management

Classroom Management is something you cannot live without in! From the time I was in Elementary School I feel like times have changed. As a teacher I feel I have to be extremely careful not to get on a parent's bad side. I am so blessed to be at a school where the parents and teachers work together. The parents know that they can trust what the teacher has to say about their child's work. Unfortunately, I know that's not always the case. I have also been blessed by students who (in most cases) behave extremely well & there are rarely any instances where students need to be sent out of my classroom [knock on wood]. Here are a few ways I've been managing in the classroom. Some work better than others and honestly, its all about your students and how they take to them.

Cute classroom

First thing you absolutely need to have is your classroom rules posted! You should go over these rules the first day you have students in your room, but always leave the rules up on the wall. My rules are pretty simple and the other art teacher in my building has the same five rules, so that when students have a different art teacher the next year, they shouldn't be surprised by new rules.


Some Methods:

I started the "Artist of the Day" pretty much at the beginning of the year. Each student should receive an artist of the day prize by the end of the year. Basically students get selected at the end of their class period for staying on task, working hard, showing a new technique, etc. Inside of my prize box is basically the dollar store. I stay away from candy - you never know with all the allergies these days. Pencils, mini play-dough, temporary tattoos, stickers, bookmarks, erasers, pencil sharpeners. Goodies.


One of the other first methods I tried was to create a pocket chart in which every class had a specific pocket. Inside of those pockets were a yellow "so-so" face, and red frowning face and a green "super" smiley. Each class period my goal was to give them a particular card depending on their behavior. The first class to get to five green smiley's in a row would get the silver paintbrush. For the older grades who didn't really buy the "silver paintbrush" idea I was going to give them free art time. While excellent in theory - it just didn't work out for me. I could never remember to change the smiley at the end of the period because it's sometimes chaos when we are cleaning up. I thought there had to be a better way.

This other method I am attempting to get started has a daily reward. I made three separate letters, that when placed together spell "ART". I just got them laminated and placed magnetic tape on the back. You can also just write the letters on the board and erase them as necessary. Each time the class is misbehaving, just too loud, talking to others instead of listening to directions, etc. I automatically take a letter down. If, at the end of the class period, the class has ART then they receive a golden paintbrush. If students have a RT at the end of class the get a silver paintbrush & if they have just a T then they do not receive any paintbrush. From other teachers who have tried this method, the only problem is getting the paintbrushes back. The teacher should return in to your mailbox at the  end of the day (or else I would have to buy 42 paintbrushes and paint half silver and half gold)! I think I may give that "special" job to one of the kids in the class. They love getting special jobs and usually do a pretty good job!


The last method (which I had to resort to) is about table points. I have a 4th grade class of 33 but I only have 32 seats at the four tables. I ended up placing at child at "Paradise Island" (I can show you a picture of the sign I made for that later). The first few weeks with this class was just insane. We took an eternity forever to get things done just because they were always talking. Anyway, I created four different sheets based on their table colors. Tables could earn a point each class by focusing on work instead of socializing. In my classroom, more than one table can earn a point each class. It's completely up to you if you want to allow that or if you only want to give one point per class. My Paradise Island goer got to select the table they wanted to be included with. Here are my signs:


Do you have any classroom management strategies that work especially well for you? Have you tried strategies similar to the ones I have been using? I'd love to know!

26 October 2011

A Day in the Life: Student Work

First off, I have to apologize for being MIA for a little while. I've just been busy busy busy or just so exhausted by the time I get home that I just curl up with a good book and hit the hay even earlier than usual. I'm just going to share a few of our finished products from first, second & third grade. These are some of the best pieces from each class. The ones shown are most likely hanging in the hallways at school right now!

For first grade we looked at Diego Rivera's Delfina Flores and talked about background. [Delfina Flores is a painting of a small child. The child was a daughter of a maid in Diego Rivera's house. The image of the girl uses an indoor background as a "clue" to where she was.] In our class we talked about "clues" we could draw to show where we are in our drawing. Here are few examples (one wasn't completed when I took the photographs, but his drawing was so good; don't worry his coloring was phenomenal!):


I love how she used the texture rubbing technique for her sky!


In second grade our project was "Self-Portrait with a Friend". Student's focus was on accurately drawing two people and showing two examples of overlapping in the image. We looked at Grant Wood's American Gothic which I'm sure everyone has seen. Its the farmer and his wife with the farmer holding his pitchfork. We talked about who is closest to us in the picture and how we know that through overlapping. Students were so enthusiastic in sharing about their friends it was so much fun to hear their stories! Here is just one sensational example:

From his "clues" I know him & his friend love soccer!
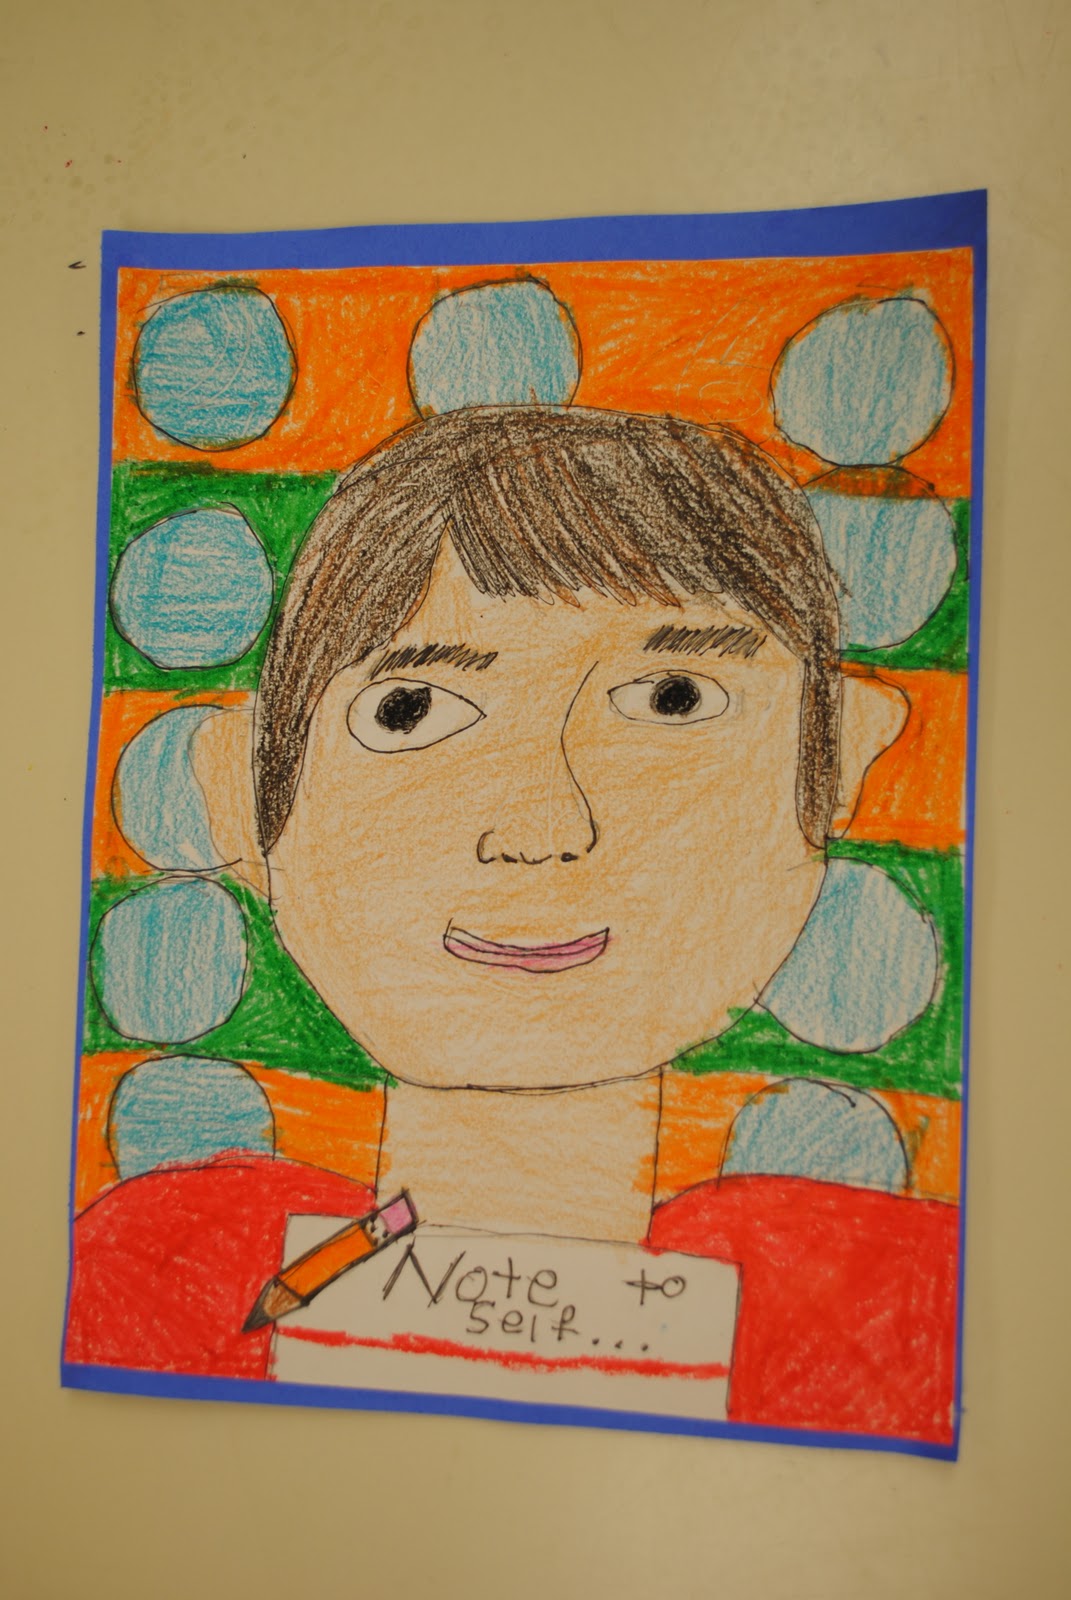
Throughout third grade our product focus (what they will create) is all about the human face. Learning how to correctly draw a face in proportion and then taking that further in different directions. So this lesson (one of the firsts) was learning the proportions of the face and drawing their own faces in proportion. Students used mirrors to view specific features (although at times students were making faces in the mirrors instead...). The main focus was the proportionality of the facial features, so the background was simply a design or pattern to make an abstract background. Examples:


I'm so proud of what my students have already accomplished and I'm excited to see where we go! I'll attempt to keep up to date records of my students work and share with you from time to time! Hope you enjoy these fabulous pieces of art!

If you want to see a particular grades' work just let me know! Leave me a little comment or something!

19 October 2011

A Day in the Life: 1st & 2nd Grade Weaving!

I was so excited to write this post yesterday, but then time ran away from me because I was working on getting Save the Dates ordered. Also very exciting but the most exciting part will be when I get them in the mail and they are beautiful & gorgeous right before my eyes! Anyway, I'll be sharing two lessons today that I'm using for 1st & 2nd grade. The first graders will be creating an apple weaving connected to Family Traditions and the second graders will be creating a "wacky weaving" based on colors in their Communities.

1st Grade: Apple Weaving

2nd Grade: Wacky [Wavy] Weaving


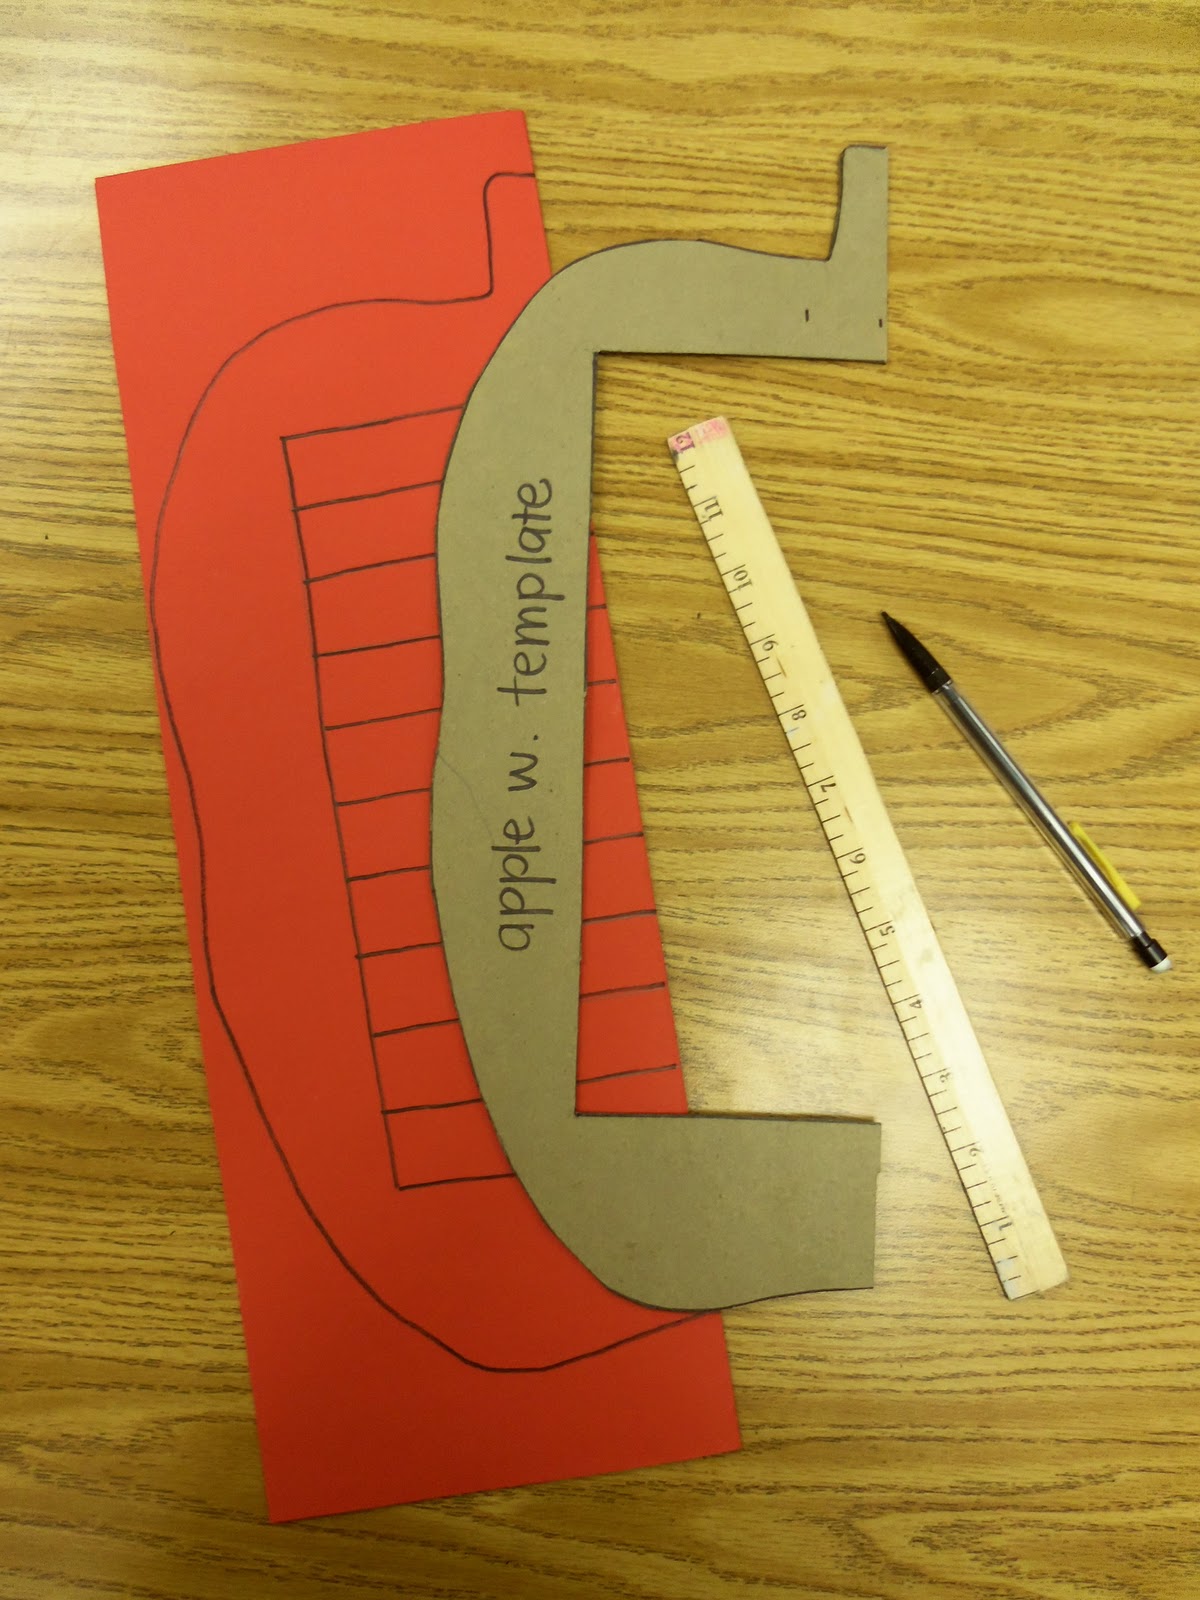
Above are the final products, but below I'll have step-by-step instructions on how to create these two weavings. Hopefully the images will help as well! The very first thing you need to do is PREP your materials. These weavings, unfortunately require an astronomical amount a lot of prep. You have to cut the strips that students will be using to weave and you have to prep the outline of the apple for first grade as well as the lines they will cut on. Now its up to you to determine the amount your first graders can handle, but to save time for the students I went ahead and prepped the lines as well.

What you need:
  1. 12x18in construction paper (this will be your "loom")
  2. 12x1in strips of construction paper (to weave with)
  3. scissors
  4. glue
  5. ruler
  6. pencil
 Start by folding your 12x18in paper in half (hot-dog style) and trace the template on it. The center of the apple rests on the fold. Once you have used the template, go back and mark every 1 (one) inch in the center block. These are the lines students will cut in order to weave through. Your completed tracing should look like this (I used sharpie to photograph the lines better, but I suggest using pencil so the lines aren't visible in the final product):


Students will receive one of the three colors I created the apples with. I just used red, green and yellow but choose whatever colors you want! Students will then cut the outside line of the apple and the lines on the inside of the apple. You have to make sure you remind them HOLD ON THE FOLD (it rhymes so they usually remember it quickly). Stress that they stop on the line that's perpendicular to the cuts or else the weaving won't work. You can use the analogy that your scissors are a race car and the finish line is that perpendicular line but they have to stop right at the line.


Once students have completely finished cutting they can start to weave! I will be allowing students to get two strips at a time so they take their time and avoid ripping the paper while weaving. I'll be setting up strips of yellow, red, green and brown for fall. Just make sure that students select any color strips besides their main apple color. Then they will have a successful Apple Weaving!


For the second grade Wacky {Wavy} Weaving you follow the same basic steps. There isn't as much prep by far for the second grade weaving though.

What you need:
  1. 12x18in color construction paper (your "loom)
  2. 12x1in color strips (to weave with)
  3. scissors
  4. glue
  5. pencil
  6. ruler 
Students first select a color to make their "loom" with. I'm placing five different fall colors on the back counter and students can select which color they would like. Once students select their color, they fold the construction paper in half, "hamburger style".


Once students have folded their paper in half, they will draw a line across the top of the OPEN part of the paper (farthest from the fold) about two inches from the top. This line is where the "race car" has to stop when students are cutting to make sure the weaving works. Then students will draw FIVE wavy lines from the fold to the line they just drew. When leading students to draw the lines, I will start with line number 3 and work my way out because students seem to pile all the 5 lines on one side of the paper or the other. Students then cut the waves making sure to stop at that top line. Students can write their name above that line as a reminder to not cut there as well. 


Students unfold their paper after making all of the cuts and begin to weave. Again, I'll be allowing students to get two strips at a time to make sure they are woven properly. They can select whichever colors they want but try encourage students to use color from community in their weaving. For students that are finished early they can use the funky scissors to create vertical strips to add to their weaving.


 Have a discussion with your students before the weaving begins, to talk about family traditions in their lives (1st grade). Explain what a tradition is for them and make a list of traditions of their families. For 2nd grade talk about what a community is. How there are different communities other than housing communities such as a school community, second grade community, classroom community, etc. Focus on colors in different communities that each student could include in their weaving.

I'd love to hear if you attempt this project either at home or with students! If you have any questions, throw them my way! Good luck & Happy Weaving!


11 October 2011

A Day in the Life: Organization

As an Elementary Art Teacher you will have a lot of students. That's an understatement. I have roughly 550 students and teach twenty-one classes over the course of the week. It's. a. lot. That's why you absolutely have to be organized!


I cannot stress organization enough. Let's just say that David is extremely proud of my OCD-like tendencies in the art classroom. I have folders for every class and inside of those folders I have smaller folders for each of the tables. In my classroom I have four different tables all labeled with a color, so the smaller folders are color labeled. Those large folders go inside of cabinets labeled with the days of the week. Here's a panorama of the back of my classroom with those lower cabinets labeled.

Panorama: back of the classroom.


There are labels on the lower cabinets coordinating with each day of the week.


 On the upper cabinets I have laminated color-coded sheets labeled with the grade levels Kindergarten to Sixth Grade. On these sheets I put up examples of the current projects we are completing, so students know what to look ahead towards and I can also remember what in the world we are doing in each class as well.

Students should also be aware of their art grade. Instead of students wondering what an A, B or C means, I made a poster for students to see daily. There is a visual representation as well as verbal to explain what each grade means.


You can also see the binders I have on the bottom shelf. Let me just say that you will buy a bagillion binders as a first year teacher just to keep organized. I have binders for the different media used throughout our curriculum, so inside are handouts, helpful worksheets and examples pertaining to the specific media.

No matter what you do to get organized, its super important you make your room "home-y". Add a lamp, an area rug, pictures of loved ones, pillows, postcards, a coffee maker, etc. As a first year teacher, I've found out that most of my time is spent at school, so make sure you make it comfortable!

Any ideas about keeping organized, no matter if your a teacher or not? How do you keep everything at home organized?

04 October 2011

A Day in the Life: Start with Art!

So I'm going to attempt to post once a week about a day in the life of an art educator. Yup, a day in the shoes of me! An art educator - the best job in the world - okay, I may be biased.

Best thing of today were the countless hugs I received. The best one of all came from a darling 1st grader. He not only gave me a hug, but also jumped up and wrapped his legs around me. I was literally holding him up. So adorable. He was pretty much this excited:

[Link]

Anywho - early in the year, as in the first day we met in art class, my students and I made sketchbooks that we will be using throughout the year. The students could decorate their sketchbooks in any way that they liked. I encouraged them to at least draw their grade number on their sketchbook & then add whatever designs they wanted. Here are my lovely sketchbooks!

My K-6 Sketchbooks!

After we created sketchbooks, we worked on a mini-project for a PTA fundraiser and this past week we dove head first into our lessons! Kindergarten worked on Shapes, 1st grade is drawing self-portraits, 2nd is drawing self-portraits with a friend and so on.

What I am super excited about are the 5th and 6th grade contour line drawings! Actually, I'm in love with 5th & 6th grade, so anything they do is fabulous! In art, we're training the students to draw what they see, not what they know. So many times do you have students that draw a house that's just a square and a triangle roof, in reality there are no houses in this county that look like a square with a perfect triangle roof. So to help them learn how to do this, they have to turn off their LEFT LOGICAL brain and crank up that RIGHT CURVY & FUN side. They don't like it at all. Here are some blind contour drawings (aka you can't look at your paper, just the subject you are drawing) we've been working on this week in our sketchbooks! This improves eye-hand coordination and influences kids to draw what they see, including all those little details.

Student aren't allowed to look at their paper, but instead focus on the observation.
Students concentrating & working on getting a detailed drawing.
I love it when kids come to my class & are so very excited to learn. What's even more exciting is when I see them outside of class and they stop to say hello. If only I could learn all five thousand five hundred fifty of their names!

I know I will never have the same experiences I'm having already with the same students, so I'm trying to remember that there's no place like here.